Getting started
Neo4J was selected to test a graph database implementation of the data model that evolved from the Institutes as it offers a free tier with versatile functionality. It can be easily used to demonstrate the generic utility of graph visualisations. A more extensive development of this conceptual framework would use the open source Network X Python library (https://networkx.github.io/).
The following instructions assume that the user has installed the Neo4J Desktop application
Importing the sample data
- In the Neo4J Desktop interface, create a new Project
- In the new Project area, select Add Database and create a new Local Graph
- Start the database service
- When the database has started, open the Neo4J browser
- Use the command “
:use system” to switch to the system database - From within the system database use the command “
create database <your database name here>” - Open a Terminal session from the options contained below the Open button
- Stop the database service
- Move into the binaries directory with the command “
cd bin” - Load the sample data with the command:
“
neo4j-admin load --from="<path/to/sampledata>" --database=<your database name here> --force” (Use backslashes \ on Windows systems) - Restart the database service and open the Neo4J browser again
- Use the command “
:use <your database name here>” to switch to the newly loaded data
NB. The Neo4J interface requires a basic familiarity with Cypher to interrogate the data. All records in the database can be returned with the command: MATCH (n) RETURN n
Sample Queries
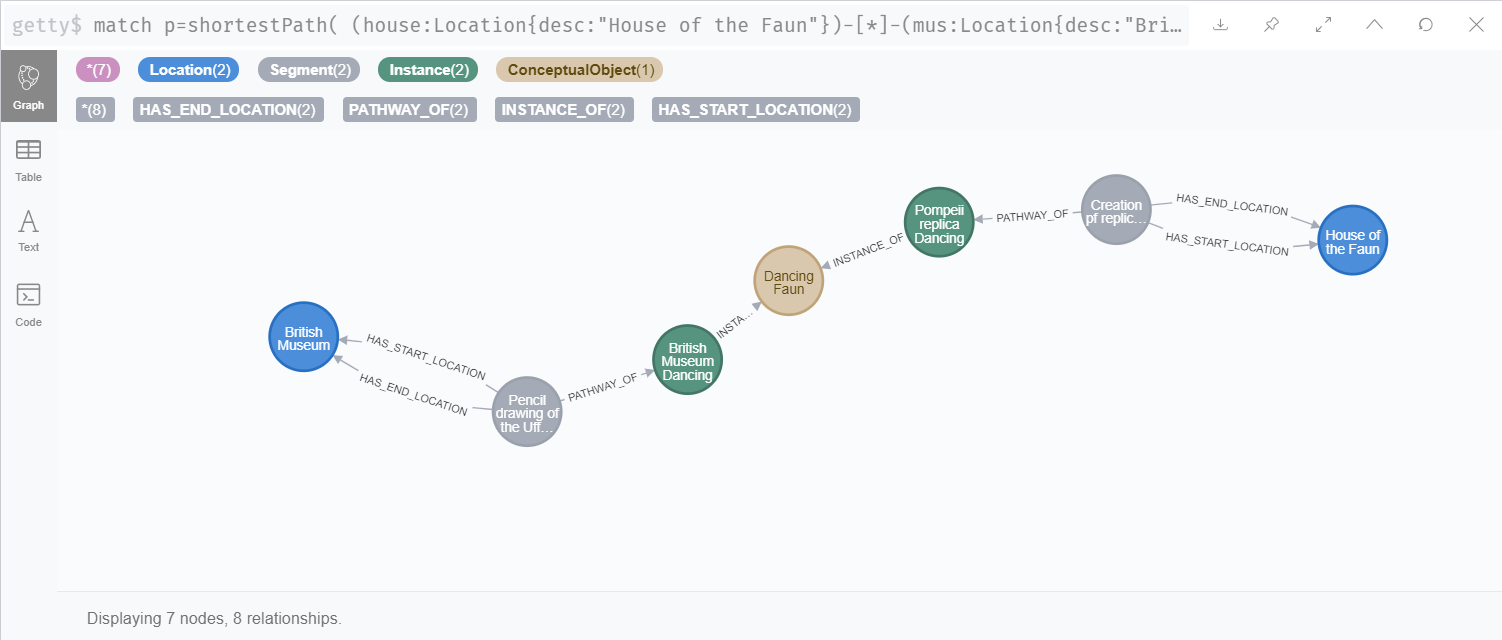
Find the shortest path between two nodes:
MATCH p=shortestPath(
(house:Location{desc:"House of the Faun"})-[*]-(mus:Location{desc:"British Museum"})
)
RETURN p
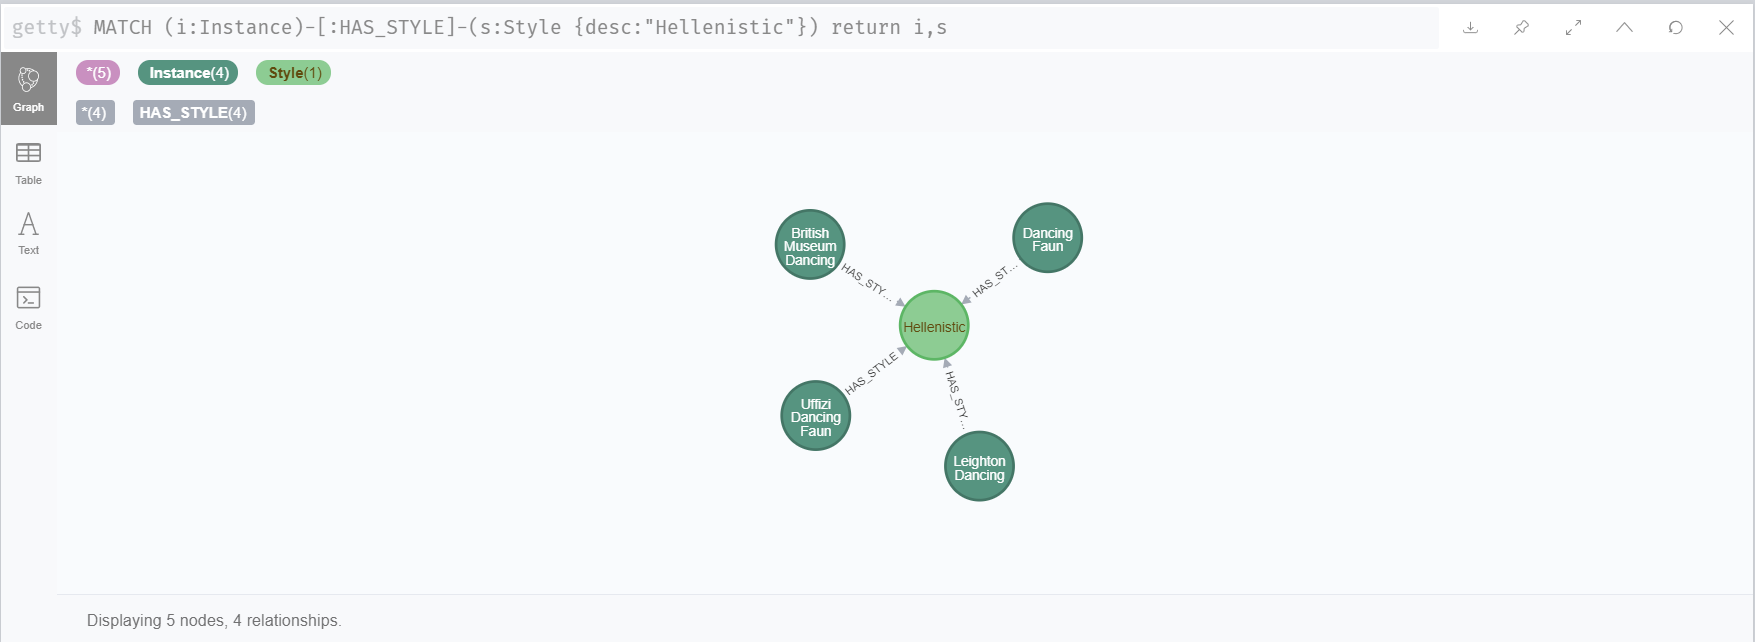
Find all Instances in the Hellenistic Style:
MATCH (i:Instance)-[:HAS_STYLE]-(s:Style {desc:"Hellenistic"}) return i,s
Changing the default database
Some of the Neo4J plugins will work more seamlessly if the default database is amended. This is set in the file neo4j.conf which can be found in the Application data location which was set during installation of Neo4J Desktop.
Within the data storage location you will find the directory structure:
neo4jDatabases/database-<your instance here>/installation-<version number here>/conf/neo4j.conf
Near the start of the configuration file you’ll find the lines:
# The name of the default database.
dbms.default_database=<insert you databasename here>
…which can be edited accordingly and the database restarted to pick up the changes.
Using Neo4J Bloom to navigate the data
Neo4J Bloom provides a simpler interface for exploring the dataset without knowledge of the Cypher query language. Firstly ,with the database running, select Open > Neo4J Bloom.
Bloom allows user to define ‘Perspectives’ on the data. A sample perspective (bloom_perspective.json) is provided here as a JSON file which can be imported.
Ensure that your Bloom session is using the correct database that you have created using the drop down list in the interface. The Perspective file provided can be imported using the button on the right.
NB. It is also possible to edit the data through the Bloom interface, though this isn’t recommended here.
Find a ‘starting node’ by clicking in the Search area and starting to type ‘ConceptualObject’ - autocomplete will suggest a category which you can select, and this will return two nodes into the interface.
Right-click on the Node labelled 2, and Dismiss it, leaving just the Node labelled 1.
Right-clicking again will show the option to expand the connections to this node.
Please refer to Neo4J Bloom documentation to explore more fully.